React Crash Course Part 3/3
This is part 3/3 notes of a Youtube react crash course.
Data Fetching
React Suspense: another way to fetch data. This is included with React. Suspense allow you to render while fetching, and you provide a fallback UI (eg spinner, or loading bar etc) as a prop (attribute).
What we’re doing in the project is fetch on render, because when it renders, it has side effect of fetching the data.
There are also other third party libraries we can use to fetch data, eg React query and SWR. It is easier to fetch data using these third party libraries, but the method we did in this tutorial (using useState and useEffect is the most basic way to fetch data from client side component).
There are so many different ways to do the same exact things in React, so just choose what works for you.
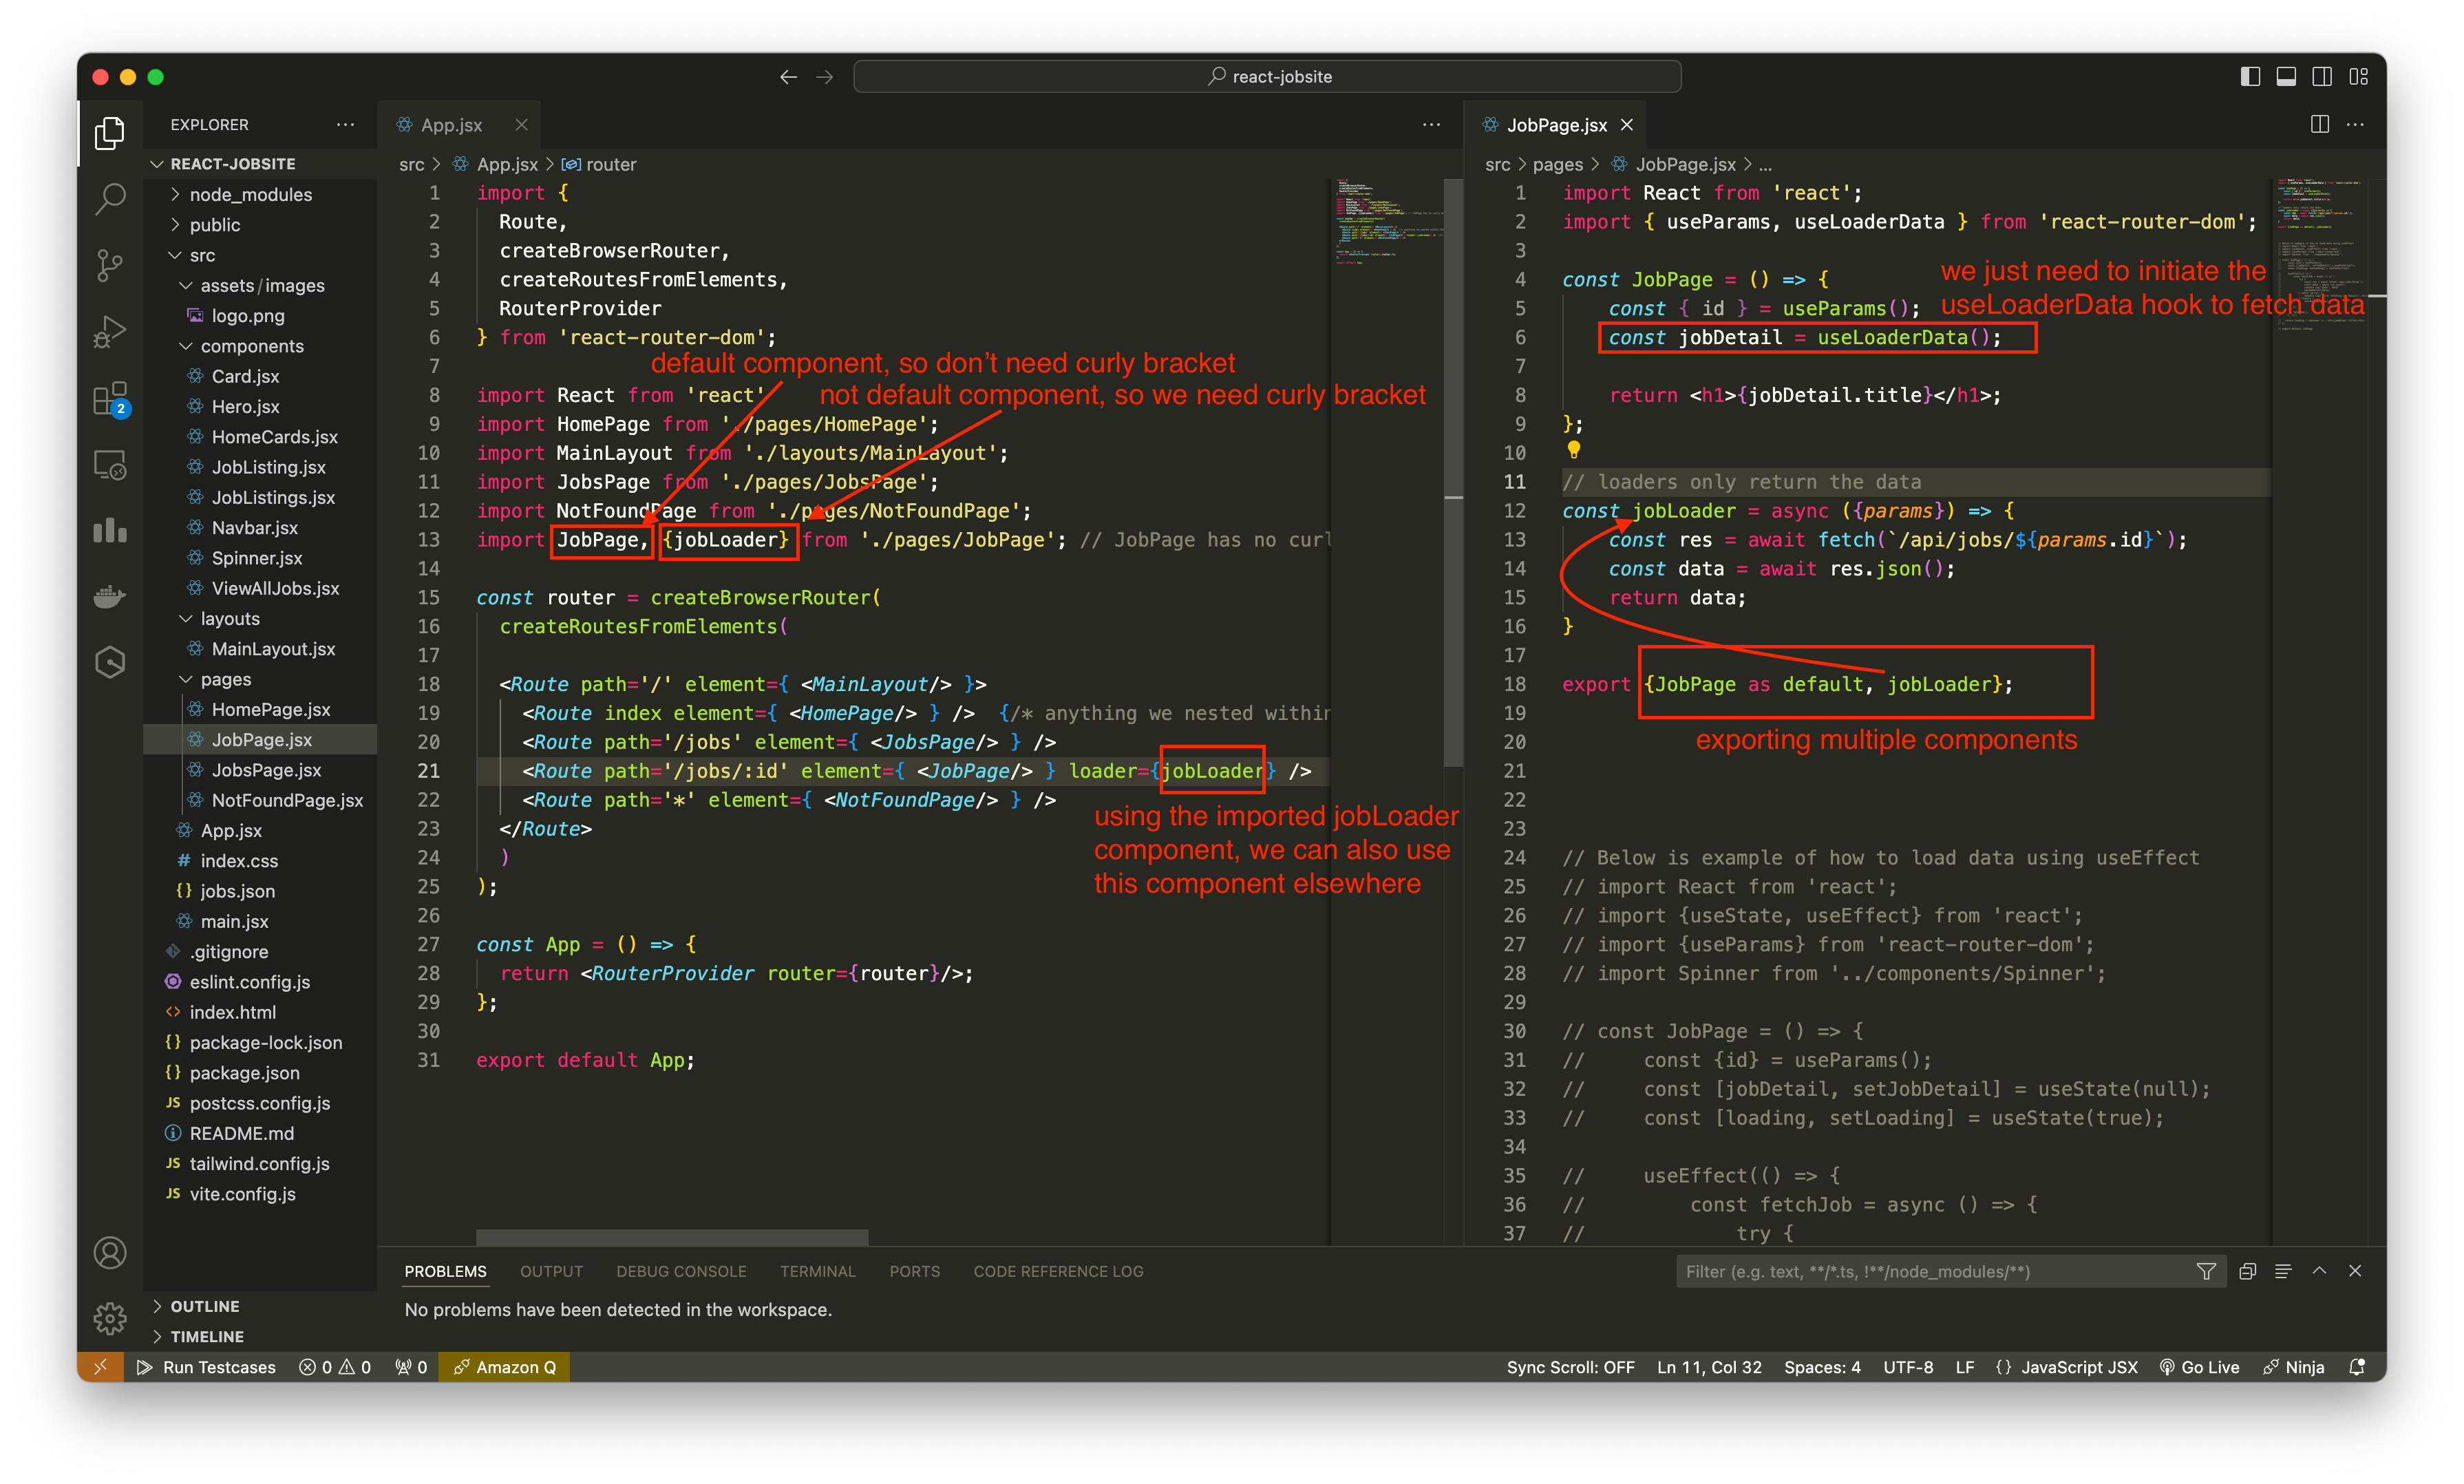
We can also use data loader from react-router to fetch data. Using data loader, we create a function in a component file then export the function from the file and use the function in other areas (basically as our global state for whatever the job is and pass it into other components).
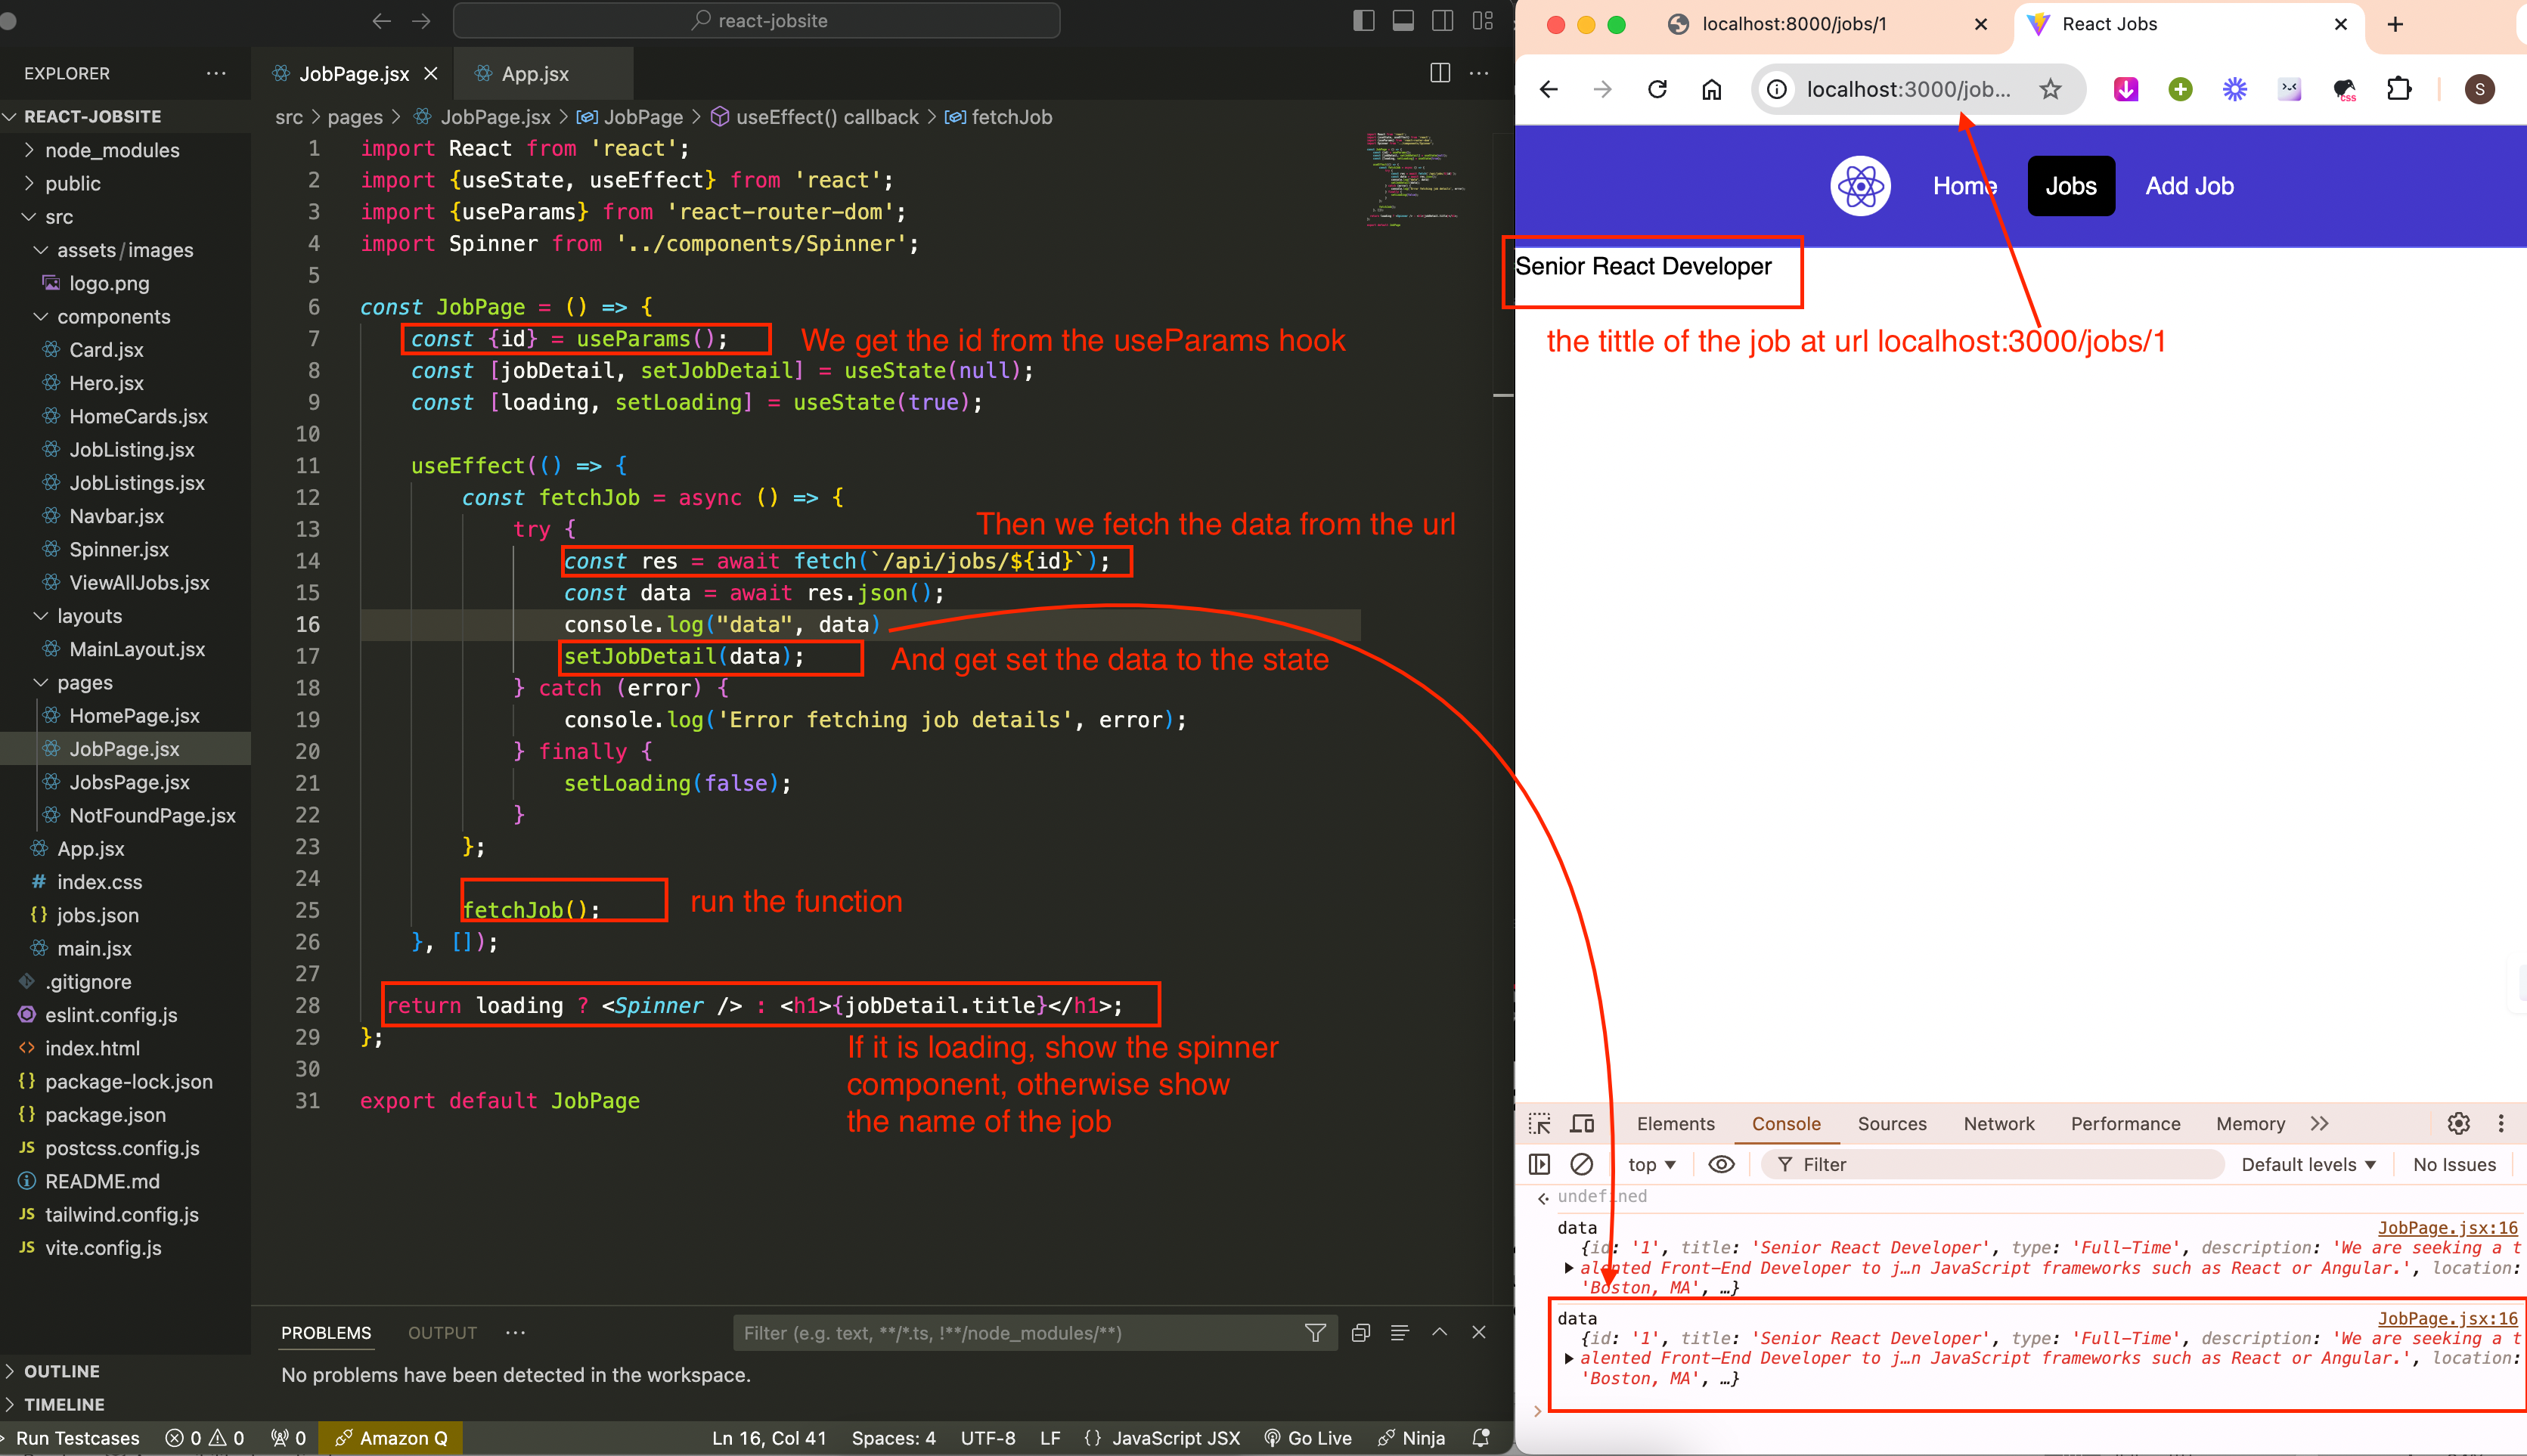
This is how to get data using useEffects hook:
Another way to get data is to use react-router’s data loaders, we can do this without having to use useEffects. We can also export the data from this component so we can use it in other components as well. Below is another way to achieve the same thing using useDataLoader hook.
There are many ways we can work with forms, but the core way is to add useState for each piece of form element that takes in user input. There are many ways to do this:
- We could have just a single object in your state and have all the fields of your form in that object.
- or you could have state for each fields in your form.
Below is an example of how you could add state to each of the form fields and access the user-inputed values from your form.
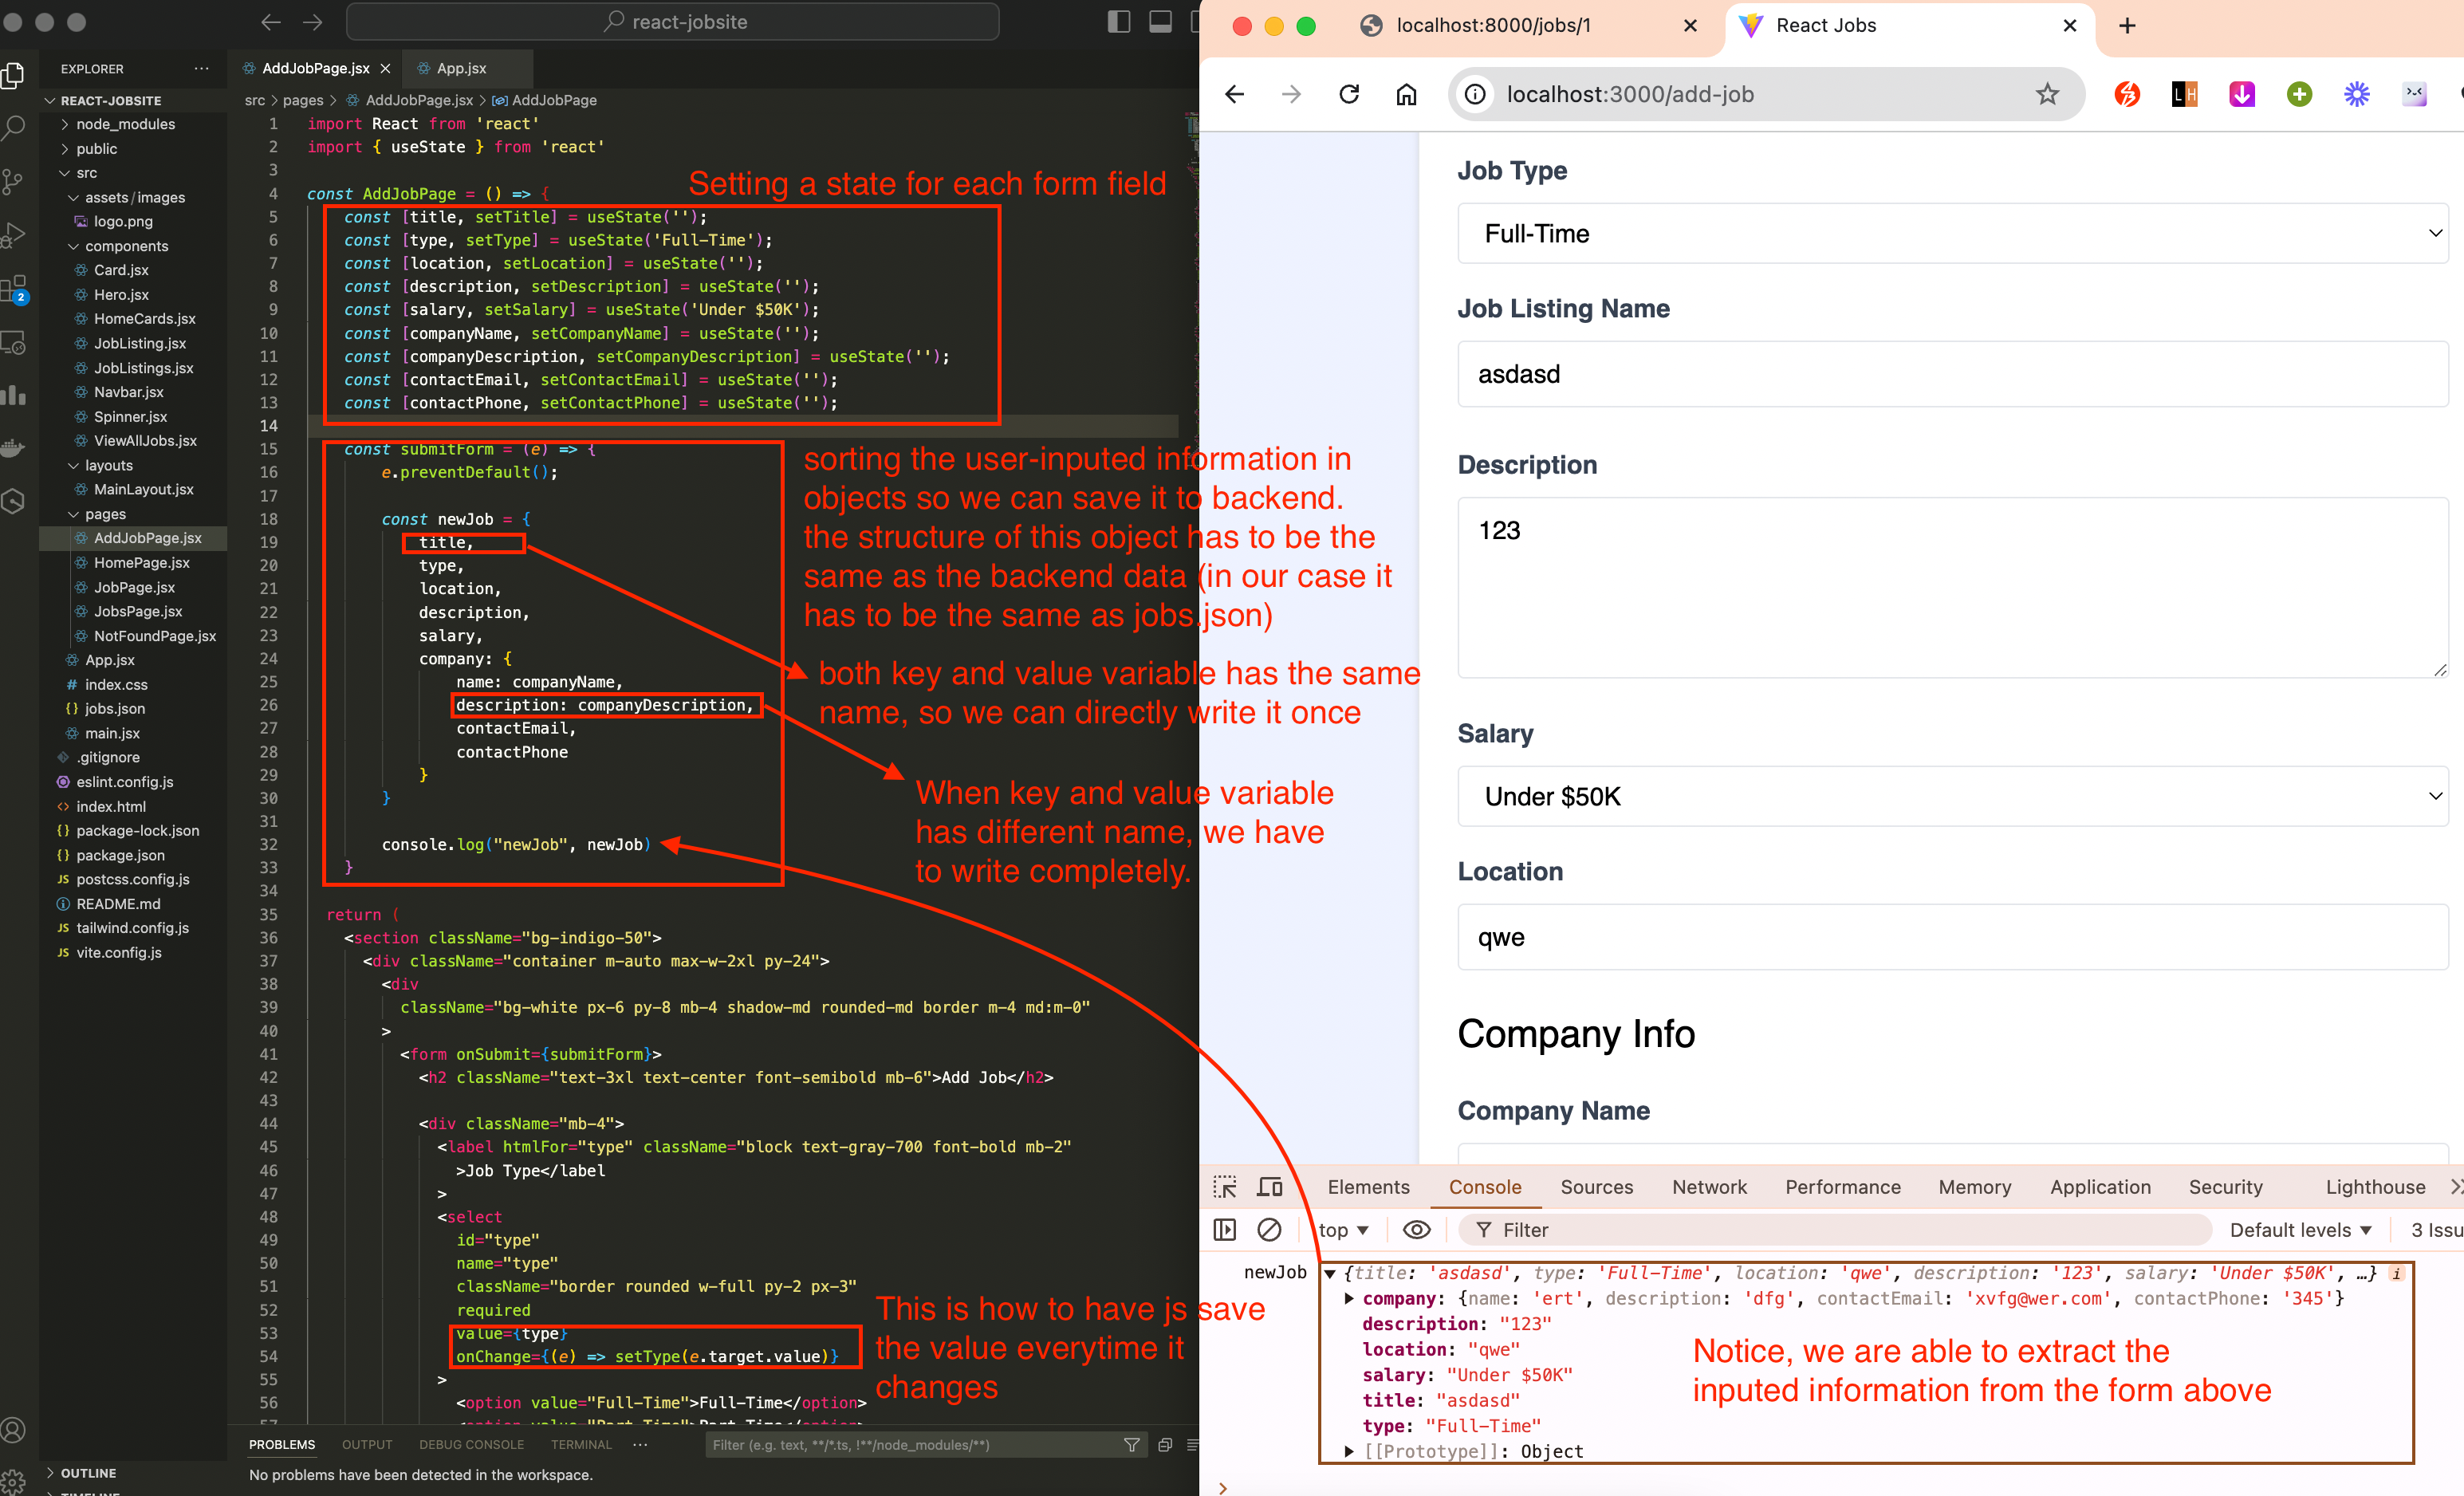
When you add a piece of state to an input, you need to add onChange, because when you change the input, the state has to update and it has to call the function to change its state. The onChange attribute takes a function. The function has an event parameter (usually we would use the variable
e). And this event parameter hase.target.valuewhich stores the inputed data. The syntax for onChange is:onChange={(e) => setFuntion(e.target.value)}. Where setFunction is the function we defined to update the value for our useState().To have javascript automatically navigate to other pages, eg after sending form, we want to redirect to the /jobs page:
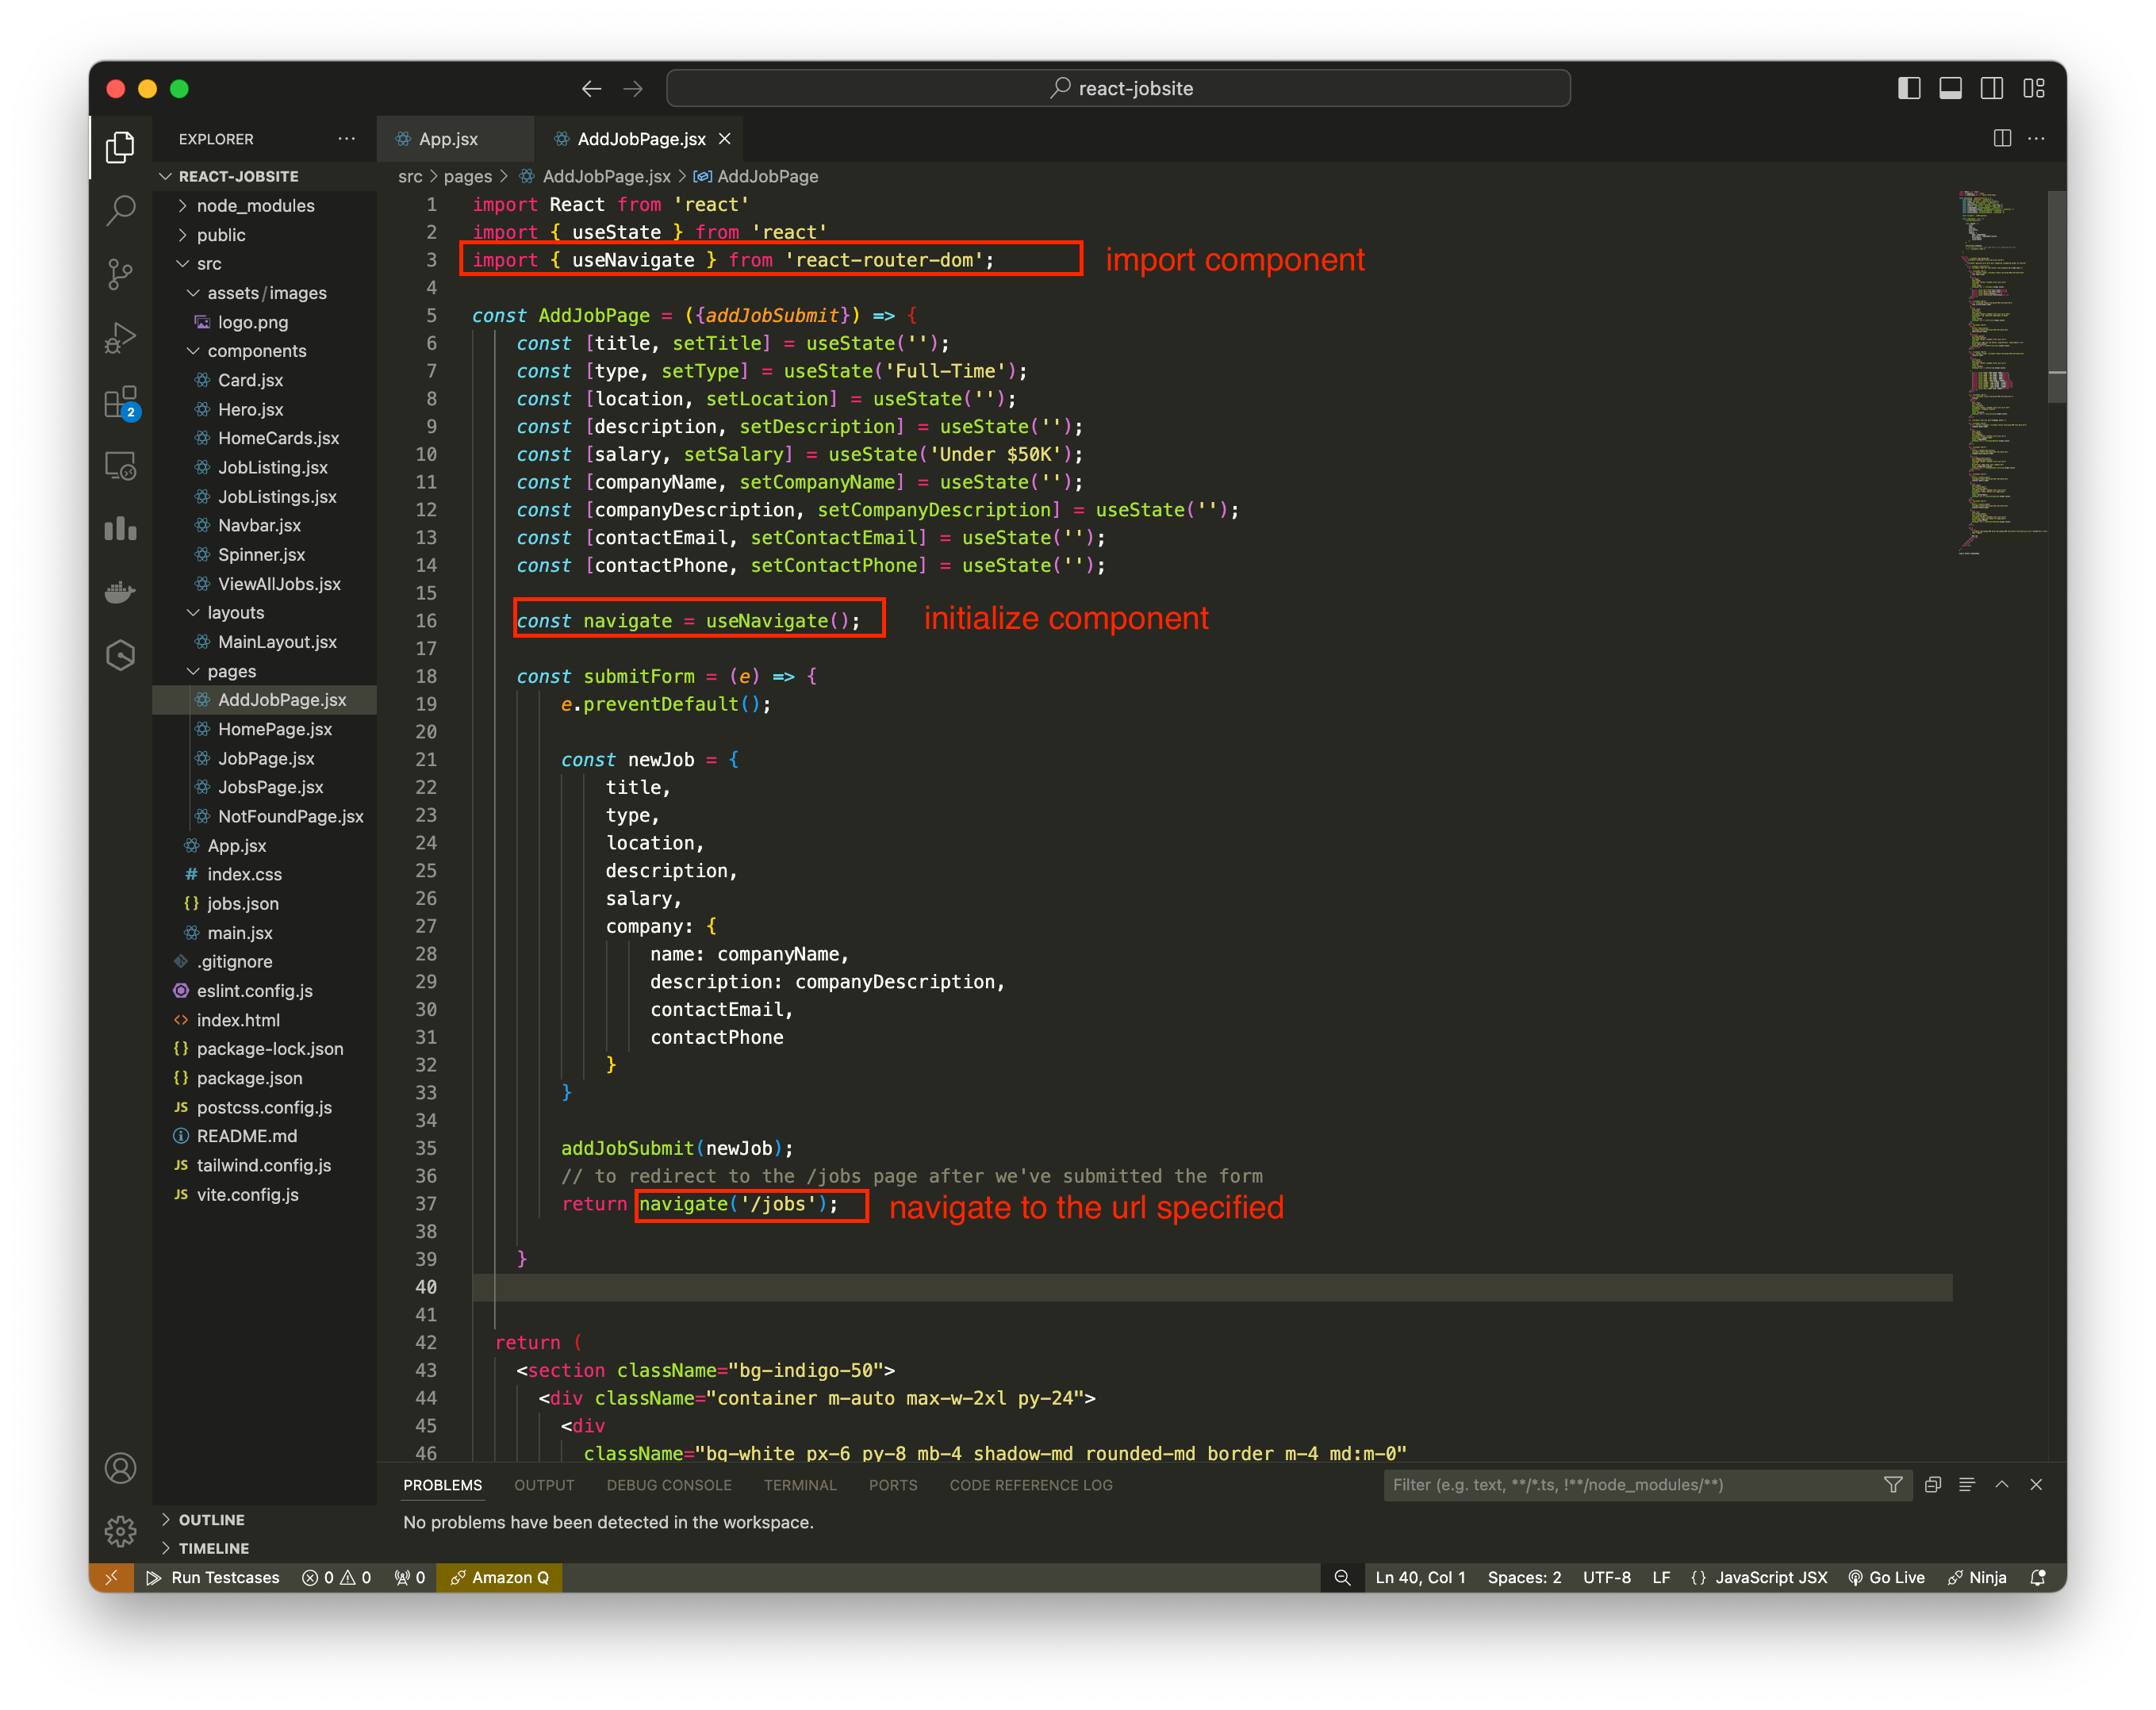
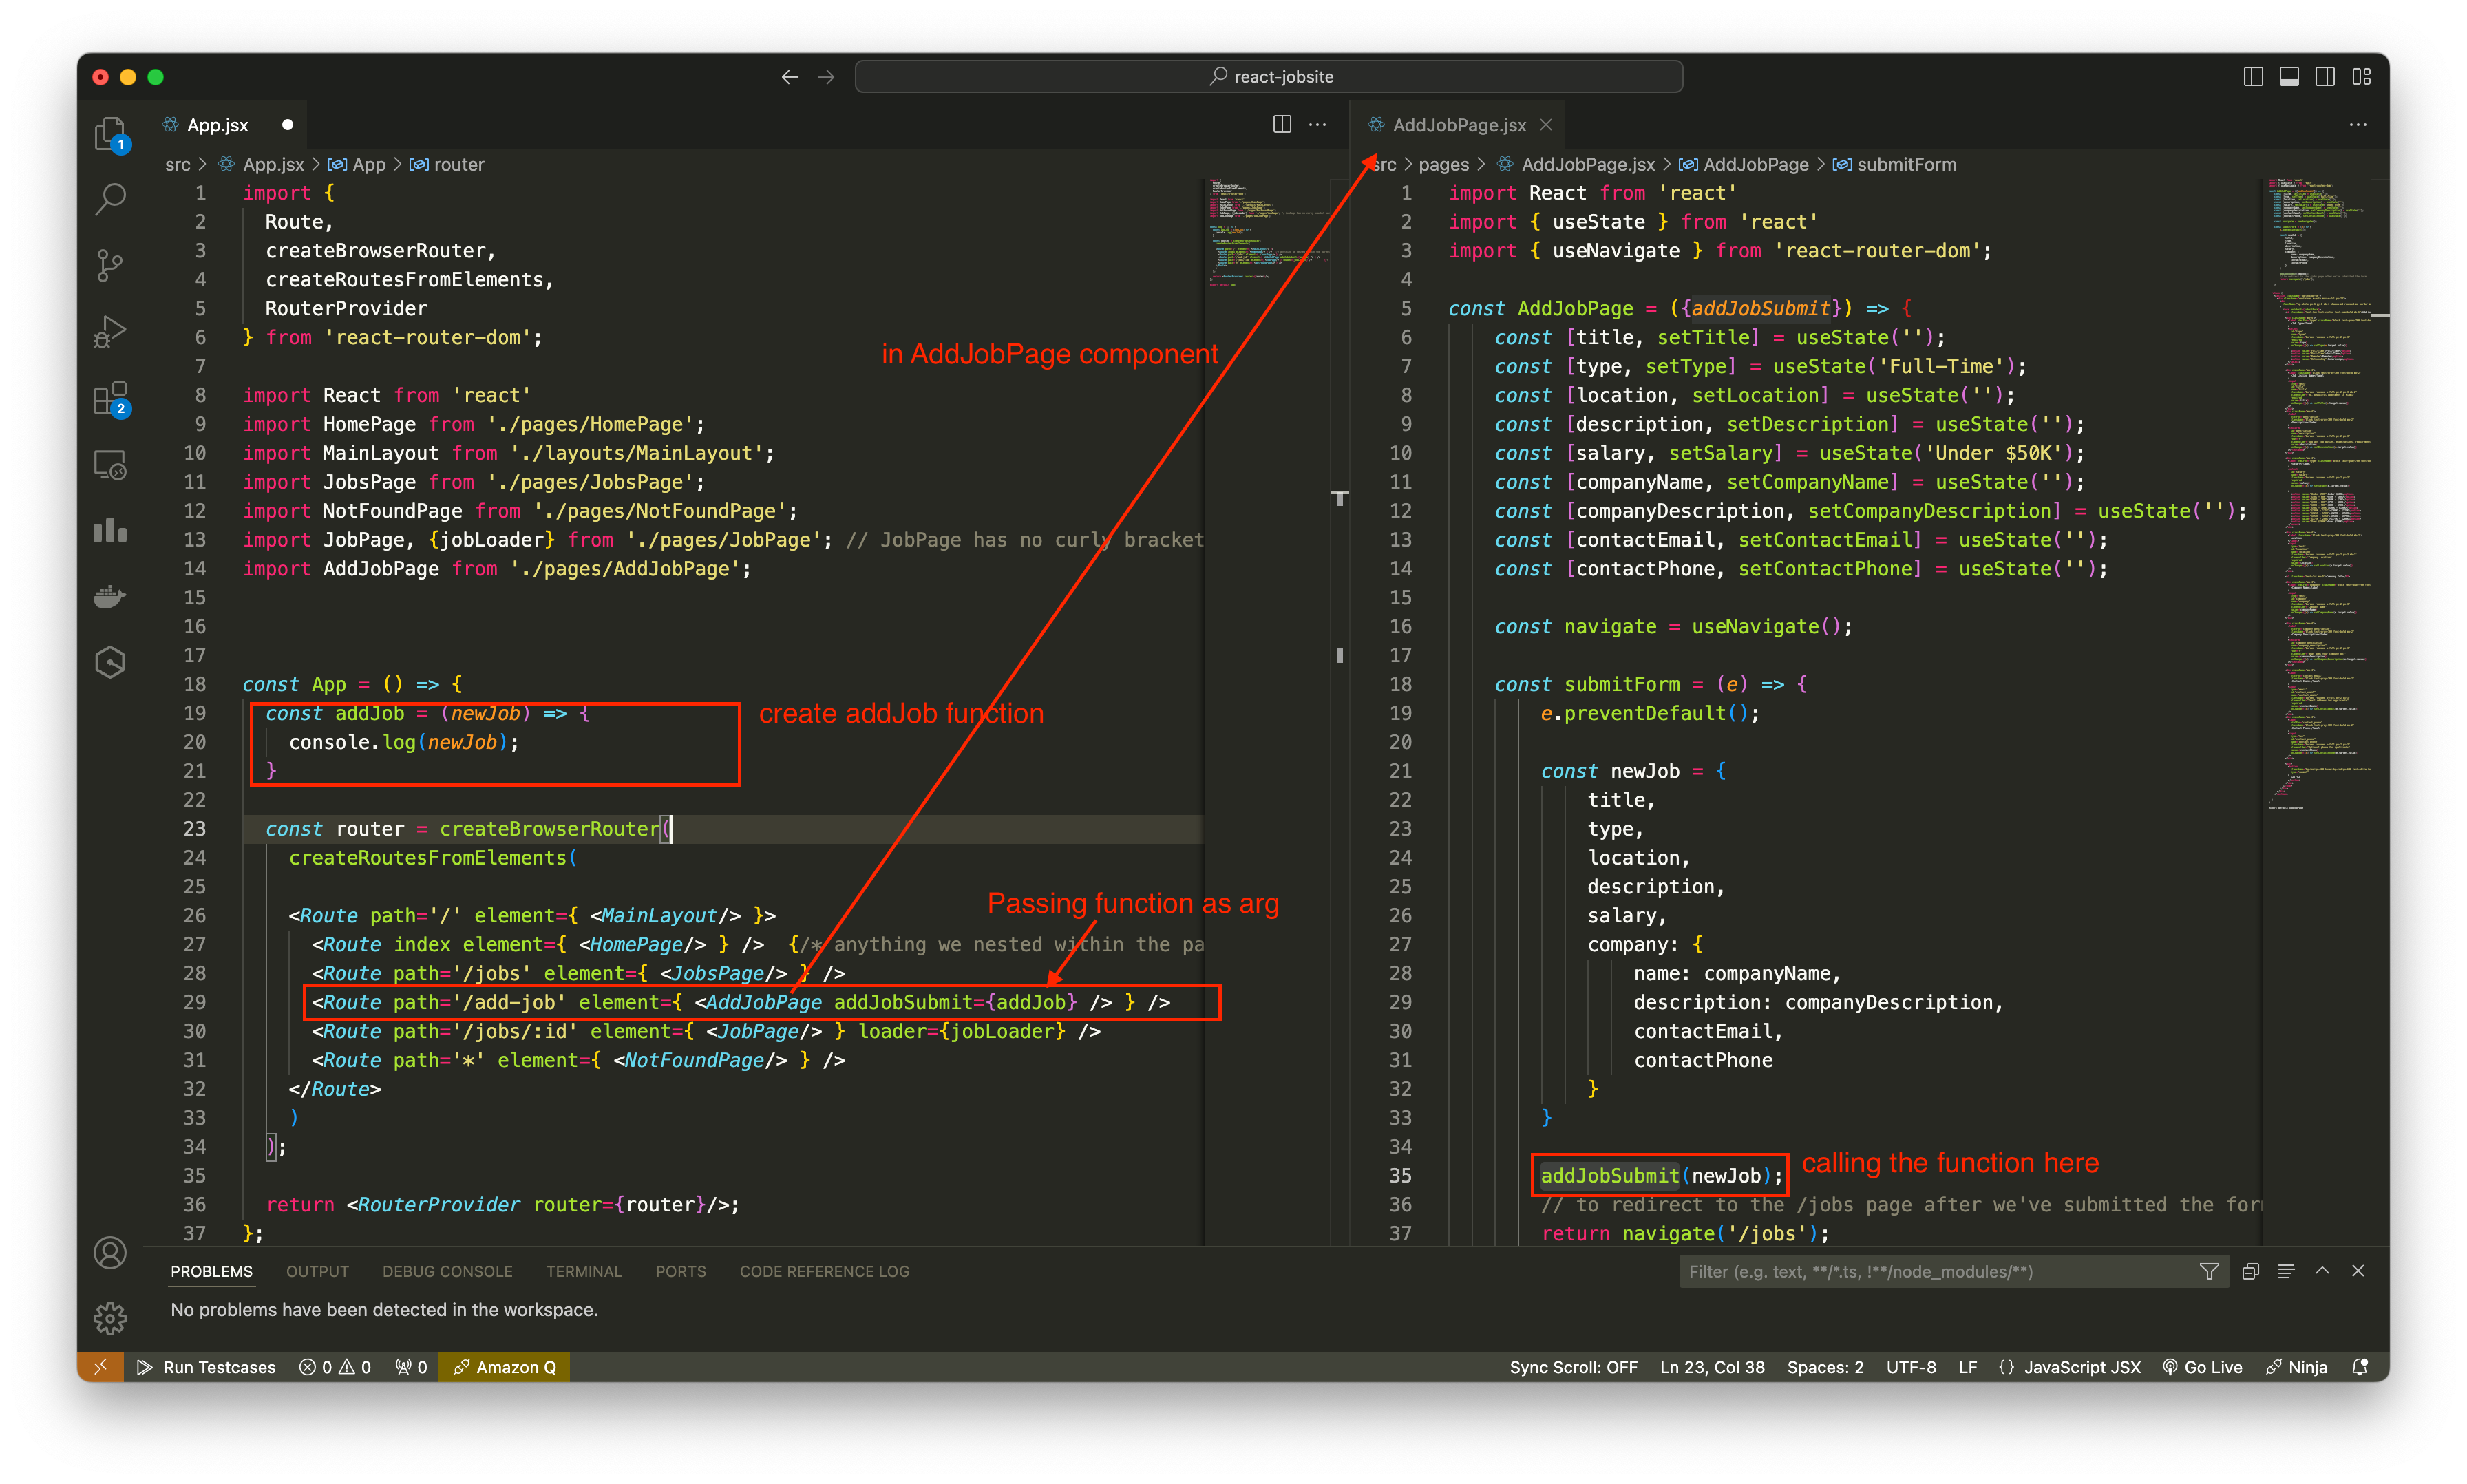
Sending function as arg and calling the function in another component.
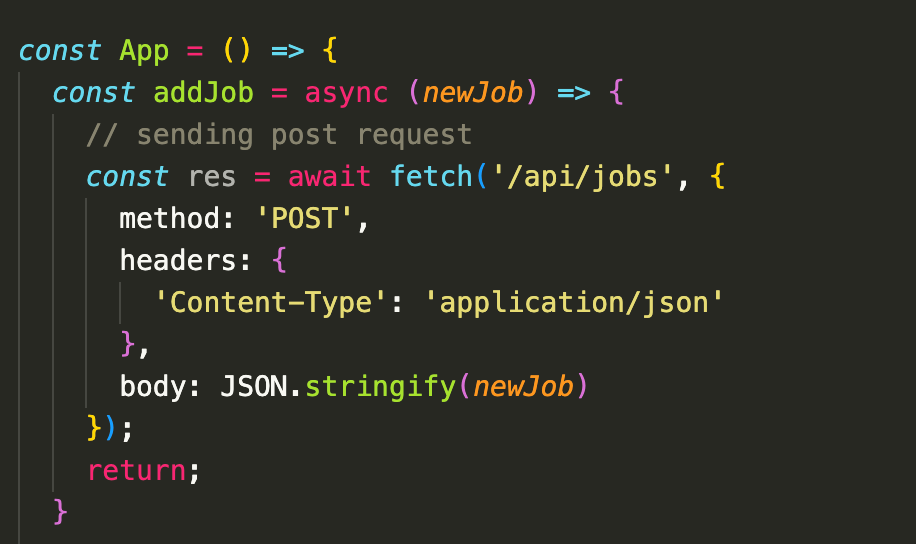
Example on how to create a post request in javascript
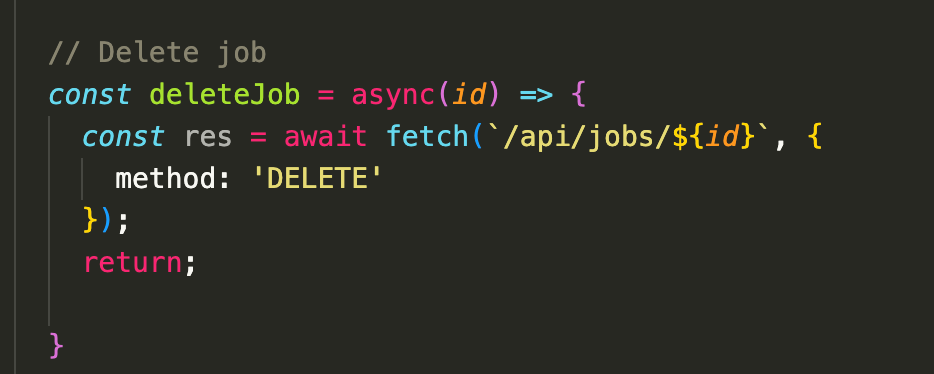
Example on how to send api delete request in javascript
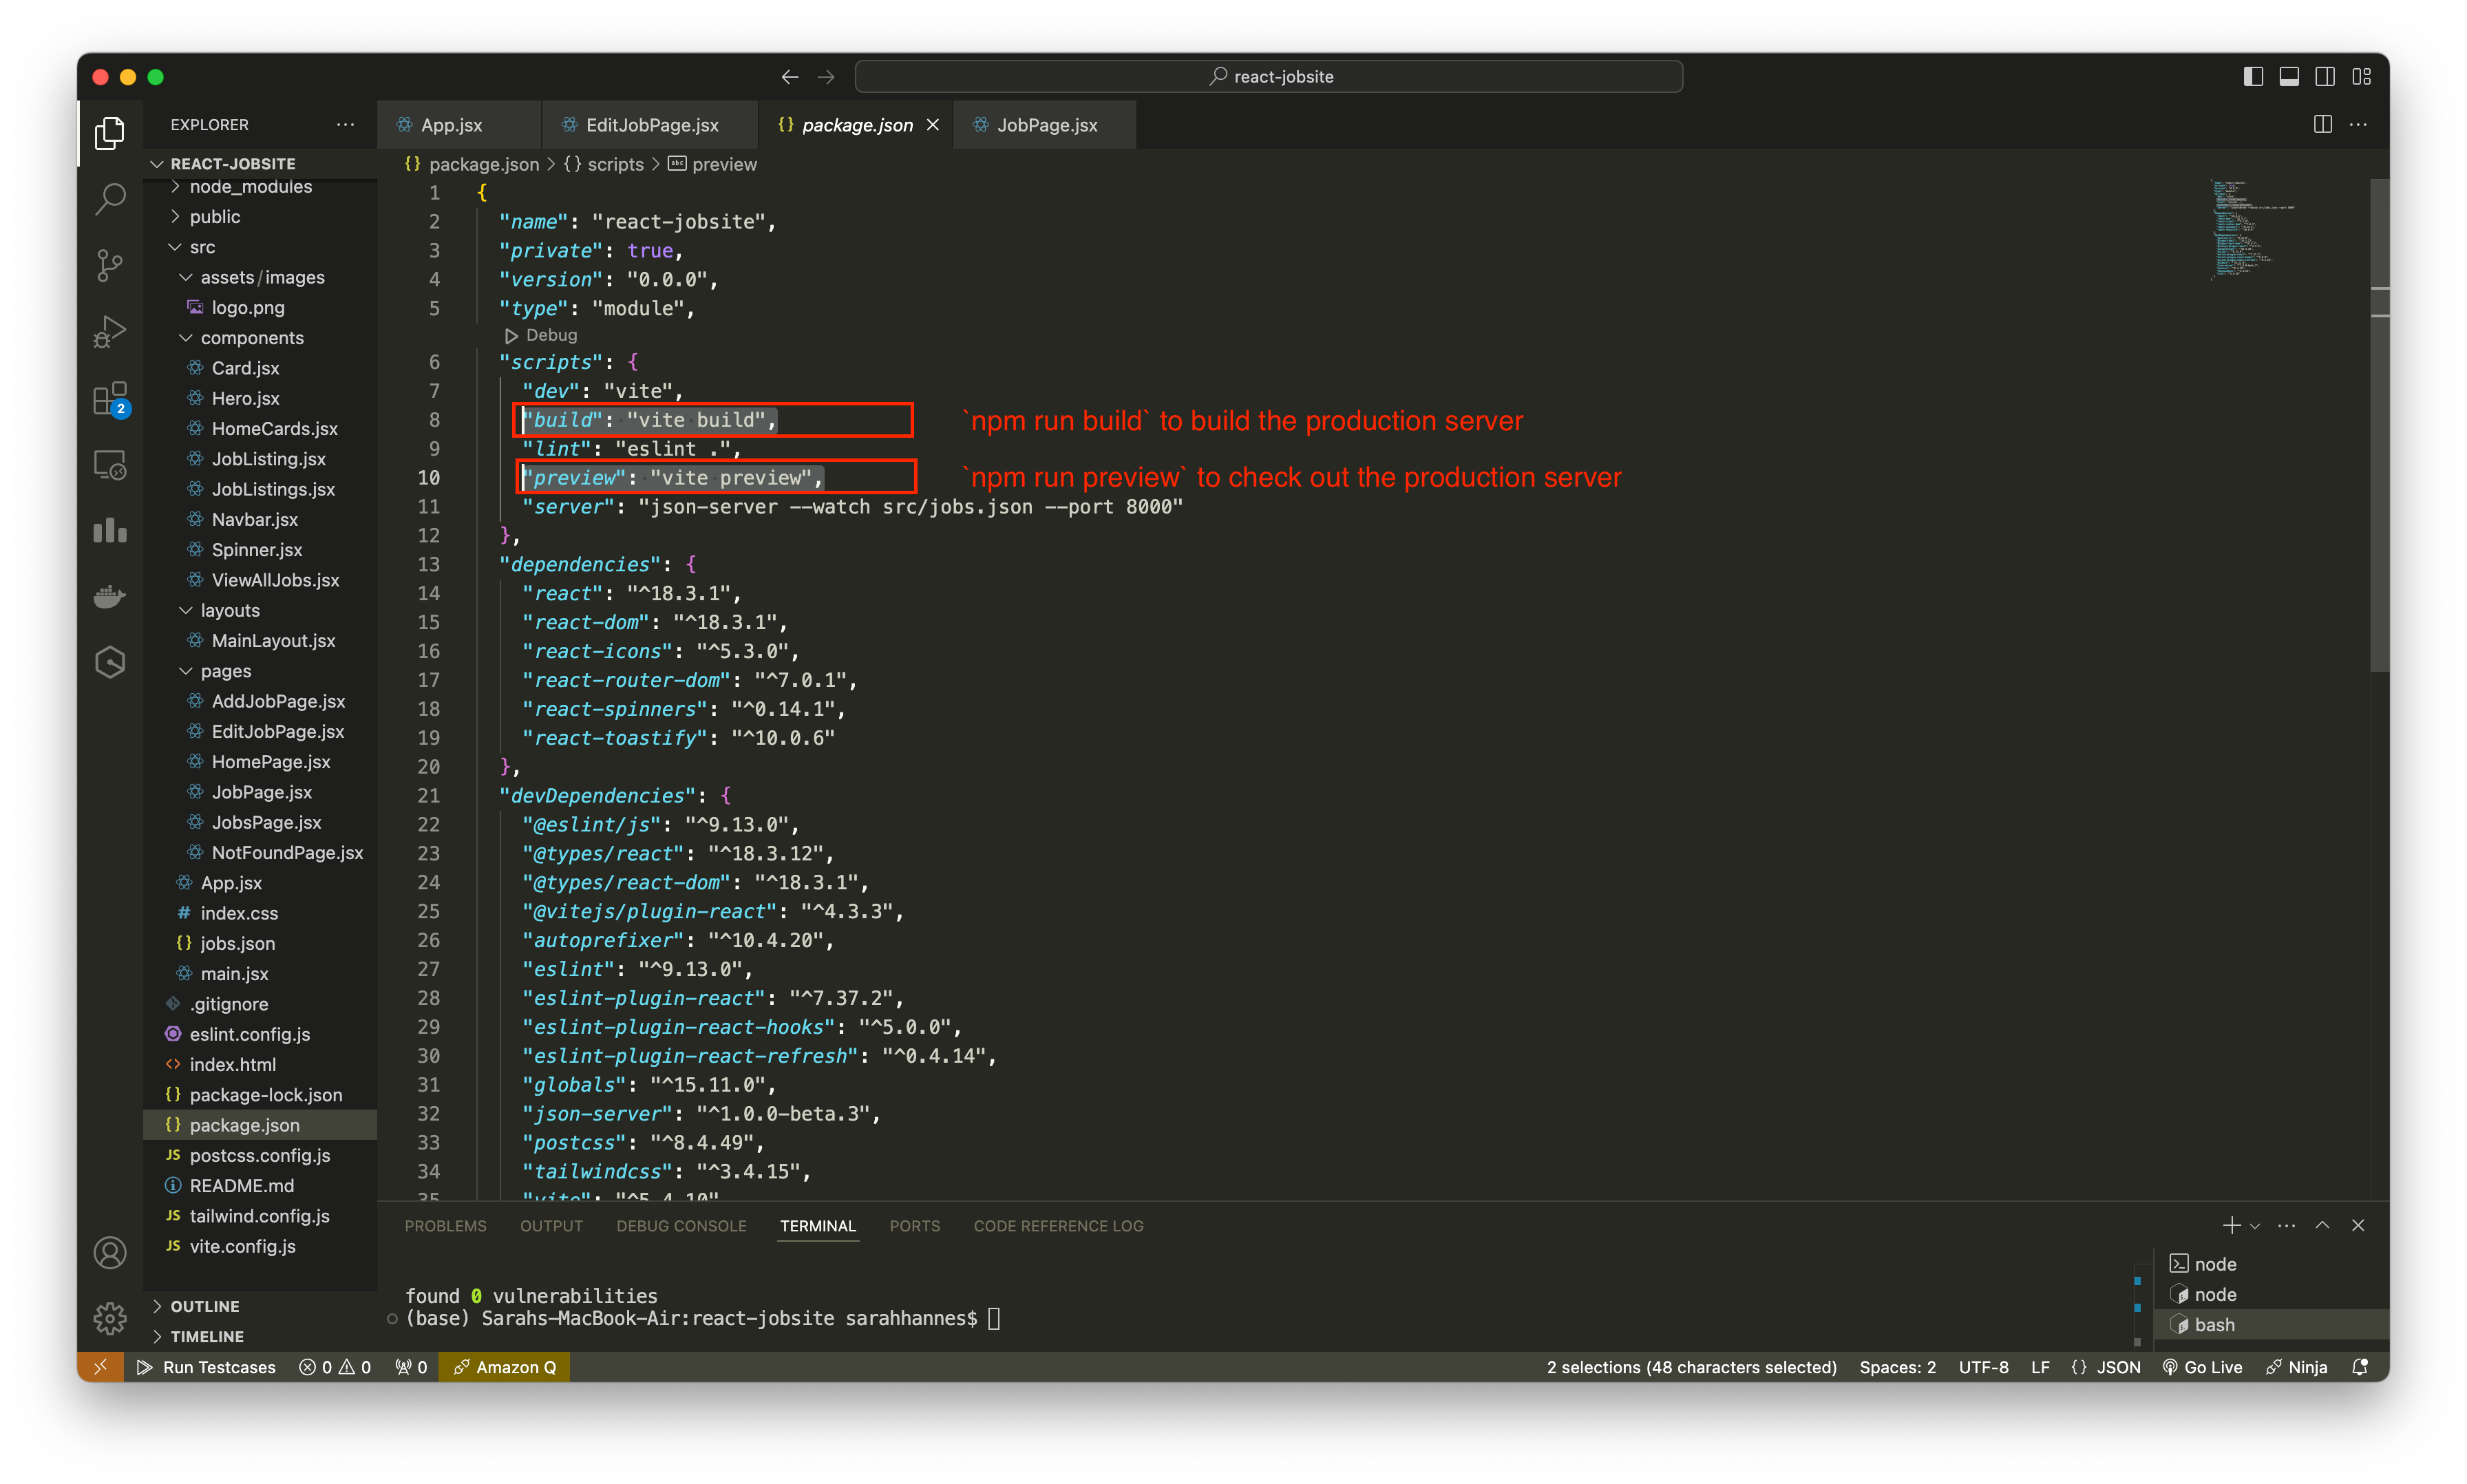
To start the production server, run in terminal
npm run build. This will create another folder calleddistin the project repo - this stores your production builds. And to run the production server, we runnpm run preview. This is possible because of we have stated the commands in the package.json.